Pages

Sunday, August 31, 2014

"Teach Like a Champion" Book Study: Chapter 1

We are doing a book study at my school which I LOVE!! It's great to read new content and have time to discuss with your peers. My school has been placed on a Priority School List which means we are in the lowest 5% of achieving schools and our students do not make adequate progress from year to year. We had a major staff overhaul this year (I'm new plus about 10 other teachers and a new Principal and Vice Principal) so we are all really excited to change things around for these kiddos and our book study is part of our efforts :) Our vice principal selected this book:
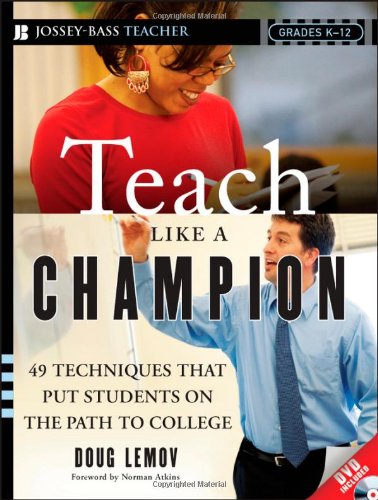
"Teach Like a Champion" by Doug Lemov, you can buy it here at  Amazon . I read this book  a few years ago and really liked it. I didn't read it though with the vigor I am choosing to read it this time (isn't the second time you read a book always so much better than the first!) and I thought I'd share our teams insights with you. So many of us are working hard to close the Achievement/Opportunity Gap and Doug Lemov's techniques are easy, yet powerful and effective. The main theory of the book is that teachers can implement these techniques to level the playing field for students of poverty with the ultimate goal of college and life success. A great thing about this book is that it comes with a DVD that SHOWS the techniques in action. If you are a visual learner like me, this is critical for complete understanding of the content so I love that it's included. Onto Chapter 1.

Chapter 1 is Setting High Academic Expectations. Each chapter includes techniques that allow you to reach the goal of the chapter, in this case, setting high academic expectations. This chapter includes 4 techniques; No Opt Out, Right is Right, Stretch It, Format Matters, and Without Apology. I'll highlight the main idea of each technique so you can get a feel for the book, but I strongly encourage you to read the book, either buying it or checking it out from your library, because not only do you get the DVD, but they outline each technique much more deeply as well as some sequences and variations for each technique that I know I will be referring to throughout the year.

"No Opt Out" is just what it sounds like. The teacher creates a culture in the classroom where no student is allowed to shrug their shoulders and say, "I don't know." When the student does say they don't know, the teacher uses certain techniques to help them arrive at the answer and then ends the sequence with the student saying the correct answer.

"Right is Right"is something that I struggle with. Doug Lemov suggests teachers often "round up" for students. A student gives a partially correct answer, possibly not giving enough detail or using a vocabulary word incorrectly, and teachers often will say it's correct and then add onto the answer themselves instead of making the student do the heavy lifting. He encourages teachers to praise students for effort, but not to confuse effort with mastery. The book includes great sentence stems for teachers to prompt students to go further as well as explains the various ways students answer questions that are not exactly right and how to address them

"Stretch It" is a technique where the learning does not end with a right answer, but instead keeps going with questions that extend learning and test students understanding on different levels. It's a great differentiation technique and lends itself well to higher level thinking as well as "how" and"why" questions.

"Format Matters" is really about making sure students are using the correct grammar, sentence structure, vocabulary, and volume when speaking because that is what will be required and make them able to compete in the college and professional worlds.

"Without Apology" is the notion that all content is interesting if taught in an engaging way so stop making excuses for why you are teaching it. It breaks down 4 common ways we "apologize" to our students for the content we teach them and the message it sends them. For example, we often tell students, "Sorry, this is boring, but we just have to learn it." Really think about what message you are sending to your students when you say this. I know I've said it before and want to focus on never again delivering content with an apology because I'd much rather instill a love of learning and curiosity about the world than the idea that anything about life is boring.

That's Chapter 1 for you!! These were great techniques to start thinking about when starting a new year. We have our book discussion next week; I'll let you know any great insights my team shares with me. Happy Day!

Friday, August 29, 2014

Classroom Set-up Day 3-6: Almost there!

I've been working hard on making sure my room not only looks and feels good, but that it is organized and functional. I'm not 100% done yet. I have a few more labels to make. I have some more decorations to put up. I've ordered some borders and name tags that I am praying get here before school starts!! I have centers to set up, but I thought it would be a good check-in because I'm *almost done and if kids came in right now, at least the space would work :)

First, here's my classroom door. It is so important for students to see their name on the door the first day of school. It makes them know that this room will be their home and that they are welcome!!
I also think it's critical to post visible procedures. It helps make sure everyone remembers what the procedures are (including me, oh how easy it is to forget!) and is on the same page about what is expected because they can see it! Parents, visitors, and substitutes also love posted procedures. You'll see my procedures posted all around my room but here is my "Good Morning Procedure"


Oh, here is my hallway space for student work too. I simply laminated scrapbook paper, hotglued thumbtacks to clothespins, and voila! A durable showcasing space that allows quick and easy putting up and taking down of student work. Plus it looks cute :)

Here is the view you first see when you walk in my room. I love having lamps, fake flowers and other homy things in my room :) I also have an adorable Box-Top complete with scissors to trim those bad boys and a basket with lunch count forms and school hall passes. Notice the cabinets below are labeled, so important!!


 Turning to the left is our check-in table. That big, ugly box will be used to put student mail in. I plan to spray paint it a cuter color; just imagine it being purple because that is the plan :) The cookie sheets and gems are used for students to make their lunch selection. Later in the day if they need to use the bathroom or go to the nurse, they move their gem from the lunch count cookie sheet to the bathroom cookie sheet which I'll show you in a minute. I made the gems and the little signs. I'll post about how I did it soon. You can also see our recess equipment. I strongly dislike the color and look of these two containers, but they were what was left by the old teacher so they'll have to do for now.


Turning to the right you'll see this! Line-Up and Bathroom Procedures, lunch menu, bathroom passes and check-out system. When they need to go to the bathroom, they move their gem from the lunch count sheet to the check-out sheet. 


Here's a close-up of the check-out cookie sheet! Students put their gem on the place they are going (bathroom, nurse, library) and then I can visually see who is gone and where they are. When they get back, they remove their gem and place it back on the lunch count sheets. Easy-peasy


 Here is the sink area next to the check-in table. The pencil sharpener is here. Check out my "Good Morning Procedure". It explains our pencil sharpening procedure. We only sharpen pencils in the morning. I call kids up in small groups, I sharpen the pencils, and their job is to make sure they have 3 sharpened pencils to last through the day. It works well and then no lesson or work time is interrupted with the sound of the sharpener. Those totes have shared supplies for the tables including crayons, glue sticks, scissors, etc. . . I don't keep them on the tables because I have found many of my students are either distracted by them during lessons or they get filled with un-necessary things so we only grab them when we need them and then put them back on the counter when we are done. I know the wall looks boring, I have an back-splash tile art project we'll complete the first week of school to brighten it up. I also have no idea what to put on that little shelf, any ideas? The curtain is hiding our emergency kit and ugly plumbing. Again, all the cabinets are labeled with their contents. This helps me, the kids, visitors, and substitutes easily find materials.

 
Let's Get Started {Beginning of the Year Math Activities}
Next to the sinks are the student cubbies. Look how clean and organizes, two of my favorite things! I have four open spots that are ready to go for last minute students. They'll store their reading books, dictionaries, and library books in the above cubbies; backpacks and jackets in the below cubbies. I'm planning on doing Amy Lemons Mathematician Craftivity from her Getting Started Unit and will hang those up on these cabinets. I can't wait to use that lesson. It will really emphasize that we are mathematicians plus it will be so cute, I can't wait!! I'll make sure to post how it goes!


Around the corner is my math manipulative area. It is critical for student independence during math workshop that manipulatives are easy to access and are labeled. I made these math tub labels with real pictures to make getting and putting away math tools easy. You can find them in my TPT store by clicking here!. I've also put math books in the math area because I believe a good classroom has books everywhere, not just the library!! Not only does the curtain hide geoboards, calculators, and other math things that the kids won't be using on a consistent basis, it adds to the homy look and feel of the room.


Here is my small group table. Please ignore all the student materials; I plan on passing them out and setting up desks the first day. I have a 1-220 chart on the well as well as a number line. The colored tubs are for me to organize materials for the week. I have a Monday tub, a Tuesday tub, etc. . . I also use the hanging file container for daily paper materials. I also keep files for things we access constantly like book logs, pre-write webs, classroom economy money, etc. . . It's hard to see, but this is also where I keep my "Ducky Helper" chart. I got a genius idea from a team member about classroom jobs!! Essentially instead of having 20 different jobs for 20 different kids which, for me, is a nightmare to remember and manage, you simply have 2 helpers each day that do everything. I laminated the ducks and am planning on writing student names on them with a whiteboard marker. This will be the first time I do this so I'll let you know how it goes!! The "Ducky Helpers" bulletin board set is from Scholastic and is a traditional job set if you want to go that route too. Plus it's less than $5 so that's great! Purchase it here The number line can be purchased from Amazon I used the little frogs that came with it to make my door decorations (see above)


Next to this area is my listening center and anchor chart area. For some reason I didn't take a picture of it, oops!! I'll update it later :)

Here's the view from the back wall facing the front. On the left is our calendar, Counting the Days pocket chart, ABC chart, School-Wide Behavior Matix, and student computers. I also have my chimes and a cute apple decoration hanging here. Above the board is my Happy Birthday display. I still need to put tissue paper and student gifts in the monthly bags but you can find the template plus Happy Birthday writing paper and learning centers with my Happy Birthday MEGA Pack . On the right is my Writing Center. I got the "Writing Center Starter Kit"  from A Cupcake for the Teacher. Get it here I made the Writing Process pencil and got the "What do Writers Write" pencil from Teacher Wife. You can find it on her blog here for free!! I've also put writing books, clipboards, tape, pencils, and various kinds of writing paper to start the year off. We'll add more supplies as the year goes on. You can also see my "Announcement Procedure" poster hanging by the clock. I told you posted procedures are super important to me!!


To the left of the board is this counter. I have my schedule and turn-in bins. See the procedure posted! Students highlight their name, date-stamp, and place in the correct subject bin. Of course each bin is labeled. I have a reading, math, word work, ready to publish, and other bin because who knows what the year will bring and sometimes you just need an other bin :)


 Here's a close-up of my schedule cards. They're not in the right order yet nor do they have the hands drawn on the clocks because administration is still finalizing schedules, but they are laminated and ready to use. You can find them in my TPT store here

Now for my favorite part of any classroom, the library!!! Maybe I should have started with that? Anyhoo, don't judge my bulletin board because, remember, I am waiting for borders to arrive in the mail. Hopefully they get here before the first day of school! I have my CAFE menu ready to go as well as a "WOW Words" section to put those juicy words we encounter. You can grab my CAFE menu headers for FREE here! I got that rug from Marshall's for $20, what a steal!! On the left are some stuffed reading buddies and fountain. Hanging on the wall are genre posters from Beth Newingham and you can grab those for fee too here! I get lots of questions about the spinning book case on the left. I got it as a gift from an old mentor teacher and have no idea where you can find something similar. If you do find a retailer, let me know! I plan on painting both bookcases in my free time (can you hear the laughs in my head as if I have any free time?) We will meet here for class meetings as well as whole group reading and writing workshop mini-lessons. I plan on just pulling over my teacher chair and easel from my small group area. I sill have some pillows and other decorations to bring it, but it's almost done!

Here's a close-up of student book boxes. I got the book boxes, covered just the front with cardstock, Mod Podged the whole darn thing to make it more durable, and then use mounting adhesive to attach the student numbers. P.S. I love Mod Podge and if you haven't yet discovered it's amazingness, please do!

I organized my library by theme and made labels to go on each tub. I just hot glued them on. I love hot glue just as much as I love Mod Podge! I'm in the process of making little stickers to go on each book with the same picture as what is on the book tub so students can easily put their books away. I'll post that as soon as I finish it.


 My desk is in the corner. Here's what I can see from it. Almost done!!
Tuesday, August 19, 2014

Classroom Setup: Day 1-3: Don't worry, I'm not done yet either!


First getting into room. Furniture is a mess and what they heck is all the stuff hanging from the ceiling!! I had my work cut out for me!

I've been working in my room for 3 days. You see, I had to move rooms again. The first room was the room of a retiring teacher who left a lot of things that I had to clean out. Then I switched grades to 2nd grade (yay!) and so I moved into another room of a retiring teacher who left a lot of things that I had to clean out. The second room was not as bad as the first room and I did get a lot of goodies from them, but let me tell you; my process has been slow people. 


I finally have cleaned out all the cabinets and put things away. The insides of the cabinets are not 100% organized but hey, at least stuff is put away. My library is sorted, a HUGE project that feels so great to get checked off. I still need to label bins and put up a bulletin board, but the books are sorted by theme and placed in tubs so that is a win. 
Library Before: Lots and lots of books to sort!! Yay for big classroom libraries :)
Library During: Books are sorted!! I need to get another rug and a few more storage totes for the books stacked on the shelves. I also want to put paper on the book boxes so they aren't so boring white and label the bins and put up the bulletin board, but at least the books are sorted!

There are still piles of garbage, recycling, books to surplus, and things to donate, but furniture is in place and arrangement is another HUGE project that feels good to get done. 


Displaying 08122014257.jpgDisplaying 08122014258.jpg
Furniture mildly set up, look at all the garbage and so many things to donate/toss!! See those cabinets and three filing cabinets in the back? They were FULL of old lesson plans and materials. Although you can't tell, I spent HOURS cleaning them out and getting them all organized. This will be a huge time-saver once the year starts.

I also finished my attendance/lunch count board. It has sections for all of our different lunch choices. We have quite a few options for lunch at my school (hot, salad, sandwich, yogurt, or lunch from home). The board also has sections for kids to move their magnets to when they go to the bathroom, nurse, library, or work with another teacher. I'll post more details on how I made it soon. I'm not sure if I love it on the door yet, we'll see how it feels once everything is done. 
Displaying 08142014286.jpgDisplaying 08142014285.jpg

I did manage to tear down all the posters and signs the old teacher left on the walls. Like this thing
Displaying 08112014256.jpg
Touch Points are a good resource, but this just takes up too much room and doesn't look as crisp and professional as I like my displays to be. I also pulled down all the things hanging from the ceiling. If you look at the first picture, there were table flags and some clips to hang work; I didn't like the cluttered look of it all. I also was able to put up one of my displays, the calendar!!
 The adorable Frog Calendar set is from Carson-Dellosa and can be found here!

I'm hoping to go back in soon to keep working. Check back for updates!


Wednesday, August 13, 2014

Common Core Math Games plus a GIVEAWAY!

One of my absolute favorite ways of increasing learning in my classroom is with math games. They are fun and engaging! They are a Quick, Easy, Effective Instructional Strategy. They also can be super cute. They should be easy to use and good games are typically able to be played again and again. 

I wanted to make some colorful, fall and winter themed math games for my 2nd grade class this year. We will be focusing on addition, subtraction, and place value the first few months of school so I made games that aligned with these standards and had adorable, seasonal things like pumpkins, turkeys, gingerbread men, and penguins. The results is my Common Core Math Game Bundle. I'm excited to get to school to print and laminate :)

I'd love to do a GIVEAWAY of these game to hopefully add some fun to other classrooms and to make your job of teaching math a bit easier. Enter below!


a Rafflecopter giveaway


Here are some of my favorite other places to get math games.

K-5 Math Teaching Resources
The Education Center
Evan-Moor

I'm planning on posting a FREEBIE from this bundle soon! Check back :)


Tuesday, August 12, 2014

Tasty Tuesday: Steak and Avocado Slider Meal

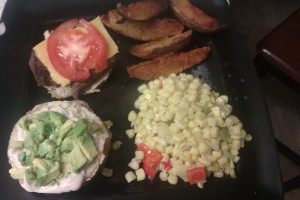
Happy Tasty Tuesday!! Here is a super delicious meal; Steak and Avocado Sliders, Creamy Corn Casserole, and Crispy Potato Wedges! This meal is perfect for game day or a casual dinner meal. I made it last night for a casual meal in. I wouldn't say it was exactly easy; there are many steps and it's a bit time consuming, but each step itself is easy-peasy so if you have a little bit of time to chop and prepare, you must try this! The great thing too is that you can easily make a lot of each part of the meal so that means leftovers, yum!
IMAG1481
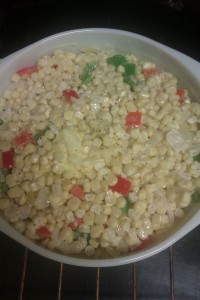
Let's start with the corn casserole. Make sure though to put the potatoes in the oven and marinade the meat before you get started. Details on these recipes are further along in the post. I got the idea for the corn casserole from Pioneer Women, here is her blog,Pioneer Woman Blog. I also have her books. She has FABULOUS recipes, all made with real food. She also is down to earth and quite funny. I took her corn casserole recipe and switched it up a bit. I honestly was a bit skeptical, "Corn casserole? Never head of that before! I guess we'll see how this turns out because I am not going to the store again!" but when I took that first bite, I was hooked! I think this will most certainly become a staple in our household. It's less of a casserole and more of a really delicious way to eat corn. Here's what you need:
  • Frozen corn
  • Diced onion, I used yellow
  • Diced bell peppers, I used red and green
  • Butter
  • Cream
  • Salt and Pepper
  • Mesquite seasoning
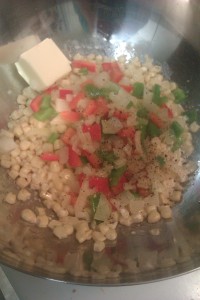
First, I sauteed the frozen corn with a bit of mesquite seasoning. I wanted a bit of a grilled flavor. My husband suggested next time we grill the peppers for that flavor. Sounds like a great idea we'll try in the future, but the mesquite seasoning worked well too. Don't fully cook the corn, then it will be mushy in the casserole, just saute it a bit to warm it up.IMAG1470 IMAG1469
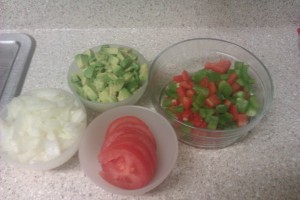
Next, saute the onions and peppers. Cooking onions is one of my favorite smells in the world! I try to work in onions to every meal just so that I can so I can smell that glorious smell! Don't overcook these either. We just want them to soften up a bit. I have no picture of this step, but look at these delicious veggies! The avocado and tomato are for the sliders later on :)
IMAG1471
Now, mix up the corn, onions, and peppers in a big bowl. Add butter, I used half a stick for about 4 or 5 cups of frozen corn. (I am horrible at measuring exacts, I like to taste test instead). Also add cream or half and half. I added about 1/2 a cup, but would add a little less next time.Season with salt and pepper. Depending on if you use salted butter or not will dictate how much salt to use. You really want the creaminess of the sauce to be a bit salty for contrast. Remember, we didn't add salt while cooking any of the veggies so be a bit liberal, but you can always add more later if needed. Salting a recipe is definitely a talent and varies based on palette. Then put the whole concoction into a casserole dish. Bake at 375 for 20-25 minutes. I put it on broil for the last 5,  I love doing this with a lot  of recipes, but as I said before, I think I added a little too much cream and really wanted some of the liquid to cook off. It comes out warm, creamy, colorful, salty, and a great side dish!                                                    IMAG1473IMAG1474
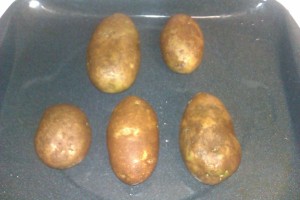
Now onto the wedges which you can cook while the casserole is baking. You should have been baking the potatoes for about an hour while doing all this corn prep. Scrub them clean and then salt them heavily and bake until done. 350 for 45 minutes to an hour depending on your oven and size of the potatoes. Take out and let cool. You could microwave, but then the skin won't be nearly as crispy.
IMAG1468
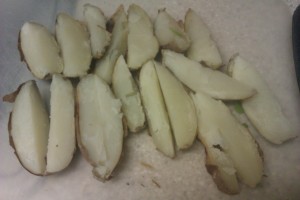
After the potatoes have cooled a bit, cut them into half and then half again, making wedge shapes. They'll be a bit starchy and mushy. Break them up a bit. Then season with salt, pepper, and garlic powder.    
                      IMAG1475
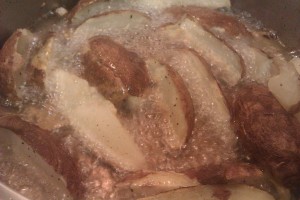
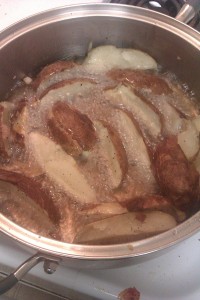
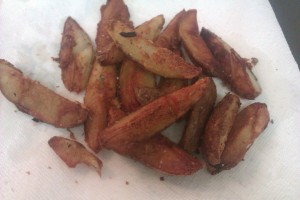
Lastly, fry them in about 2/3 inch of oil. The sound of those little guys frying right up is enticing ! Make sure you flip them so that all thee sides touch the bottom of the pan at some point. But don't flip too much! This will cause the wedges to simply fall apart. Two turns is all you need so that each side gets one turn.
IMAG1477 IMAG1476
Remove them when they are golden brown and place of a plate of paper towels to soak up the extra grease. Salt immediately. They will be flavorful, crispy on the outside, and fluffy on the inside.                                                    IMAG1480
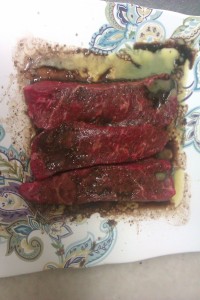
Finally the entree which ironically is the easiest part. I marinaded the steak with olive oil, salt, pepper, garlic powder, Worcestershire sauce, and balsamic vinegar.
IMAG1478
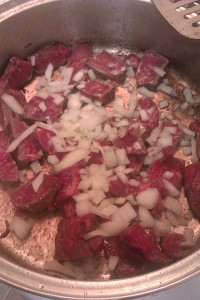
When you're ready to cook, slice into small pieces and then throw into a frying pan with some onions. I told you I love them! I like to make the frying pan really hot before I put the meat in so that it sears, but you have to be careful your pan is a bit oiled if you do this so the meat doesn't stick.
IMAG1479
Afterwards, serve on a mini-bun (we used pretzel buns) with avocado, tomato, and cheese. We only had cheddar, but I think I'd prefer blue cheese. I made a mayonnaise-onion sauce to smear on the bun. Sorry, I didn't take a picture of that but I just took the drippings and onions from cooking the steak and mixed it with mayo! I used it on the sliders and to dip my Potato Wedges into. Again, look at this delicious meal. Made with all real food and not too unhealthy :) Yummy!
IMAG1481

Monday, August 11, 2014

Meet the Teacher Linky


I'm excited for my first Linky Party and to meet so many other great teacher bloggers. Thanks to Falling into First for hosting! I'm Jenn,or Mrs. Grisham :) I'm a 28 year old teacher from Washington.

 I love this place!! We have the beautiful mountain and my favorite thing, the ocean! It's also the home of the best team in the NFL, the Seahawks!!
 I've been teaching for 5 years. I taught at 2nd/3rd grade split at a private school for 4 years and now I enjoy teaching 2nd grade in a public school. 2nd grade is my FAVORITE!! Still fun and into "little kid" things, but starting to read chapter books and becoming more independent, just the best!
I'm married to my high school sweetheart and best friend. The pictures below are from ACTUAL high school, and our high school reunion. I hope you find that as ironically funny as I do :) We've been married for 6 years, together for 13, and he's my favorite! We love to kayak, cook, and play fantasy football together. 
Us at a high school dance
At our high school reunion


Kayaking, our favorite!


We have a 10 year old chihuahua named Winston. He loves to go on adventures with us. Isn't he cute :)


He's a RUFFAREE, too cute


THESE ARE A FEW OF MY FAVORITE THINGS...
I love being in nature, reading, cooking, eating, drinking micro brews, coffee, crafting, watching reality television, hanging out with my friends. 


 IF YOU WEREN'T A TEACHER, WHAT WOULD YOU WANT TO BE?
I would love to be a traveling food writer. You know, someone who travels the world. Eats delicious food. Takes pictures of delicious food and then writes about delicious food. That sounds awesome.


THREE LITTLE WORDS THAT DESCRIBE YOU.
Fun, Hardworking, Creative

FINISH THE SENTENCE, "________,  SAID NO TEACHER EVER!!"
Conferences are my favorite! 


Q: IT'S YOUR BIRTHDAY AND YOU CAN INVITE ANYONE {DEAD OR ALIVE} TO THE PARTY. WHO ARE YOU INVITING?
To be honest, just all my friends. I love them. 


Q: IF SOMEONE WROTE A BOOK ABOUT YOUR LIFE, WHAT WOULD BE THE TITLE?
Jenn Campbell Grisham: The Story


 Q:YOU GET TO PICK ONE SUPERPOWER. WHAT IS IT?
Being a witch. I know that's not technically a superpower, but that's what I'd want. 


Q: WHAT'S YOUR FAVORITE QUOTE OR SAYING?
Trust the Universe 


Q: IF YOU HAD TO SING ONE SONG ON AMERICAN IDOL, WHAT WOULD IT BE? 
Living on a Prayer-Bon Jovi


 Q: ARE YOU A MORNING PERSON OR A NIGHT OWL?
I use to be a night owl, but in my old age and because of my profession, I've become more of a morning person, boo 

Q: WHAT'S YOUR FAVORITE RESOURCE THAT YOU'VE CREATED IN YOUR TPT SHOP?

I love my Common Core Math Games. Making math fun is one of my favorite things to do as a teacher and I just know my kiddos will love the fun themed games while they are getting much needed skill practice.


Q: SHARE SOMETHING WE MIGHT NOT KNOW ABOUT YOU! 

My cat is 20 years old. Her age really sinks in when you learn her name is Emma, that's Emma as in Babyspice of the Spice Girls; my favorite band in elementary school. I thought my cat looked innocent like Baby Spice.


************************************************************************
Your turn!! Here's what you need to join the party!!!


 Tell us all a little bit about you. Follow that up by copy and pasting the Q&A Session and adding your own answers. Make sure to include the square "MEET THE TEACHER BLOGGER" button (above) at the end of your post and link it back here so others can find the linky! When your post is published, link it up and join the party below!!!

{Please don't link to your store or anywhere other than directly to your Meet The Teacher post. 
 I don't want to delete links but I will if they go to stores or other content.}

Now visit the 3 bloggers that linked up before you and show them some love!! :)