Pages

Thursday, July 31, 2014

Goodbye First Grade!!


I love, love, love 2nd grade. Those 2nd graders are still cute and little enough to satisfy my need for adorableness, but they are old enough to tackle some real deep content. They start reading chapter books but still like to color. They're starting to figure out who they really are, but still like to read to a stuffed animal. For me, this age is the perfect mix of big kid/little kid qualities and I love it because that's how I feel like when I watch Frozen (a kids movie) while drinking a beer (a grown-up drink) The best of both worlds.


I student taught in 2nd grade and my DREAM was to teach 2nd grade in public school, helping kids who really need it. Well, I graduated college in 2008 and around here in Washington, as I'm sure it was in other parts of the country, teaching gigs were hard to come by. Funding was cut. Teachers who had been teaching for 5 or 6 years were getting laid off so a newbie teacher like me really didn't have a chance. I took the next best thing, a job at a private school.

I taught a 2nd/3rd split there for 5 years and enjoyed it. We did fun projects and the kids were really great. It was not where my heart was though. We had small class sizes, like too small. 7 or 8 kids small. It took on the feeling of a home-school group which was what the families of the school wanted, but I didn't feel fulfilled there or that I was where I was supposed to be.

About 6 months ago the DREAM ball started rolling and I took a job as a 1st grade intervention teacher in public school. I felt like I was at the right place. Our school is 80% free and reduced lunch, lots of ELL kids, and exactly where I felt like I was needed and could make a difference. The place was right. The position? Not so much. Intervention and Special Education teachers have a special place in my heart because classroom teachers really rely on them for support and it takes a certain sort of teacher to be a stellar special education teacher, however I am not that sort teacher for a myriad of reasons I will not go into here. But I did my best, made academic gains with the kids (yay!) and then took a job in the same school as a 1st grade teacher for next year.

I was stoked!! While 1st grade wasn't my favorite, I finally was a public school, classroom teacher, yay!! I moved all my stuff into the 1st grade room and started getting ready. There were rumors of 2nd grade teacher planning to retire the next year so I had a master plan. I would teach my little heart out to these firsties this year and then gain enough admiration from administration to move up to 2nd next year when she retired. Well, the universe had other things in store for me!!

I was the lone teacher working one day. Our fabulous principal let me in the front door (teachers in my district don't get keys to the building which I find frustrating, but I digress). She mentioned that the 2nd grade teacher decided to retire THIS year and that maybe she should send out an email to everyone seeing if anyone wanted to move grades before she posted the job opening. Oh man!! My little heart jumped. I told her I'd LOVE to take it. It's my favorite grade, blah, blah, blah. She said okay. Yay!!

I also got the choice of staying the room I had already moved into or moving into the 2nd grade room. I really loved the other room better than the one I currently have so I accepted moving too!! My custodian thought I was crazy because, well, I just moved into this room and perhaps I am a bit crazy, but I also am a bit of perfectionist and would much rather spend extra energy making my space feel right than accepting a less than perfect situation.

So. . . now I'm working on 2nd grade math games (my favorite!) and waiting to get the okay from our principal that the retiring teacher is moved out and I can move it. Yay for 2nd grade, finally!!

Now I'm trying to find the best 2nd grade teachers out there so I can follow their blog and keep growing. My absolute favorite so far is Amy Lemons!! I love all her teaching ideas AND I love hearing about her adorable little girl. I'd love anymore suggestions for amazing second grade teacher bloggers!

I'll end with a hilarious post from BuzzFeed: First Grade Problems. Hilarious!!


First Grade Problems


Bloglovin


<a href="http://www.bloglovin.com/blog/12652365/?claim=k4sjktwa3jv">Follow my blog with Bloglovin</a>


Tuesday, July 29, 2014

FREEBIE: Chevron Pattern CAFE/Daily 5 Bulletin Board Signs

After attending the Daily 5/Cafe Training Workshop, I just couldn't wait to get started implementing this fabulous framework in my classroom. First on the list to make was a CAFE/Daily 5 Bulletin Board. My classroom decoration colors are light blue, purple, lime green, and yellow. I couldn't really find anything that fit exactly what I wanted so I made these signs and wanted to share with you for FREE!! I'm working on making rotation cards for the Daily 5 centers next, yay!! I'd love to see your Daily 5 bulletin boards. Share your pics in the comments!

FREEBIE: Chevron Cafe/Daily 5 Bulletin Board
Don't forget to grab your freebie!

Tasty Tuesday: Chocolate Chip, Walnut Banana Bread

I'm not a huge fan of bananas. I like a banana for about a day. The first day it's ripe and then I think it tastes like mush. The texture just grosses me out!! However, we get a lot of bananas in the weekly produce basket we get from a local co-op (we don't get to pick what's in the basket, we get what we get. I actually love this because the price is AMAZING and the variety of produce encourages me to try new recipes) Anyhoo, long story short, we end up with lots of overly ripe bananas and while I'm not a huge fan of bananas, I ADORE banana bread. It's such a perfect breakfast with coffee. If I'm feeling fancy, I add walnuts and chocolate chips. Chocolate-banana is one of my favorite flavors. When I was a kid, my mom use to take me to this little 50's style diner and we'd always get chocolate-banana milkshakes, yum! This banana bread recipe uses sour cream which is what I think makes it yummier than the typical recipe. I thought it was weird too when I first read about it, but once I tried it I was hooked and can't imagine making banana bread any other way. 


 Here are the ingredients, pretty basic stuff
  • 1 1/2 sticks Butter
  • 1-1/2 cup Sugar
  • 3 whole Eggs
  • 4 Mashed, REALLY Ripe Bananas
  • 4 cups of Flour (I use 2 cups of Whole Wheat Pastry Flour and 2 cups of plain ole' white flour)
  • 1 teaspoon Baking Soda
  • 1-1/2 teaspoon Baking Powder
  • 1-1/2 cup Sour Cream
  • Bag of Chocolate Chips
  • 1 cup Walnuts

First, set the oven to 350 and butter/flour the pan so the bread doesn't stick. This recipe makes two batches of the bread so prepare two pans if you have them.


Then cream together the butter and sugar. I like to use my hands. You can use a fancy mixer if you feel so inclined. Cream is just a fancy word for mix, in case you were wondering. 


Then mix in the egg. You can either add one egg at a time or do like I do!! Break the eggs into separate parts of the pan. This makes sure the egg gets evenly distributed.  


Now mix in your bananas. I put my bananas in the fridge after they get ripe so the peel turns black. This is good though!! I used about 4 bananas. Here they are, all nice and overripe! You must use overripe bananas to make bread. Why? I have no idea, just trust me.


Now mix the dry ingredients together in another bowl. If you have not tried this flour, you must!! I love it for making any sort of sweet pastry, cookie, or bread. It's all natural, whole wheat pastry flour from Bob's Red Mill, but when you eat the delicious things, you really can't tell it's whole wheat and it adds a nice texture and sweetness. I am obsessed with this flour!


Now, slowly add equal parts of the dry mixture and the sour cream to the liquid, making sure it all gets evenly mixed. 

Lastly, fold in the chocolate chips and walnuts. So pretty!


Fill up bake pans halfway. The first time I made this, I filled the pan up all the way. Big mistake!! Not only did the bread take almost TWO hours to bake (sheesh), it was so huge and not really good for slices. Lesson learned :)

Bake for about an hour (my oven takes an hour and 5 minutes) or until toothpick comes out clean. Enjoy the bread warm with butter, delicious!! 


Monday, July 28, 2014

ABC Quilt


Look at this adorable project I saw when I went to work in my classroom, an ABC quilt our summer school students made!! It is a quick, easy, effective instructional strategy. Students search through magazines and cut out pictures to glue onto construction paper; one piece of paper per letter. After the pages are full, glue onto a big piece of butcher paper and make a quilt (don't forget to talk about how quilt starts with Q, duh!)

When I taught pre-k I kicked this idea up a notch and assigned a little homework assignment to the kiddo's. They would be assigned a letter and then be asked to bring a picture of something that started with that letter. A magazine cutout, sticker, really anything that could be glued to a piece of paper. This increased learning because they needed parental support for this activity and anytime you hooked parents, you increase achievement. Happy Day!

The First Grade Parade: Vocabulary Can Be Fun, Too!

The First Grade Parade: Vocabulary Can Be Fun, Too!


First Grade Parade is one of my FAVORITE blogs!! She is so fun and has amazing ideas and this vocabulary idea is no different. Vocabulary is something I feel I could work on. I hate having kids simply look up words in the dictionary and write down the meanings. I want them to really work with the words. I want them to use the words in their own writing and conversations. However, it's challenging to find easy, vocabulary instructional strategies that don't require a ton of prep-work. I'm always on the look-out though and this is a quick, easy, and effective strategies for increasing student vocabulary. The only materials you need are a book, chart paper, and markers. How cool and easy is that!! I will definitely be trying out this strategy this year and will post about it when I do. Happy Day!


Friday, July 25, 2014

CAFE and Daily 5 Workshop!

I was soooooo lucky to get to attend the Daily 5 and CAFE training in Tacoma, Washington this year with the Two Sisters. My frugal self did not spend the money for the tickets, but my super kind principal had bought tickets and then couldn't attend so she gave little ole' ME her tickets!! I was so excited to attend this training. I had heard of Daily 5/Cafe/Two Sisters before, had seen a bit of their work in some of my colleagues rooms, but I had NO idea how popular this model had become. I live in Tacoma (the city of the convention), but was so surprised when I learned that people had flew in from all over the country, no, make that the world, to attend this conference. We had people from Hawaii, Nebraska, Maine, Colorado, Georgia, Canada, even New Zealand! Knowing that all these great teachers had flown in just to attend this conference let me know that what I was about to experience was special. 

Ten minutes in, I was hooked! The Sisters were not only experienced teachers filled with really sound advice on how to improve literacy instruction in the classroom, but they were funny! I love funny. Especially in teaching, when things can sometimes just get so darn hard and complicated, the only way to survive is to laugh at the crazy. They shared stories from their classrooms, spoke so fondly of their students and teachers they had worked with. I left the training with an understanding of the model and an excitement to get started learning more about it and implementing elements into my classroom. 

The basic premise of Daily 5/CAFE is that to make students become better readers, they need to spend the majority of their literacy block ACTUALLY reading real books. I am so on board with this. I taught at a small, private school for a number of years and we had no reading curriculum. We taught many kids how to read by teaching them the phonics and comprehension strategies they needed, but allowed them to read what they wanted. No boring basal readers. No colored reading groups. And it worked! However, we had ten kids to a class. As I was listening I was on board with the idea, but skeptical that it could be implemented in a class of 25+. It seemed though that as soon as this popped into my  head, they had the answer. They knew that to really get kids reading, teachers needed to spend the first part of the year focusing on teaching them how to read independently and build their stamina. Once you spend the first month and a half building their independence and stamina, then you can start meeting with students in small groups or one-on-one and giving them individualized reading instruction that they need to become better readers. 

The books give much greater detail on HOW to do this and what EXACTLY it looks like in a classroom. I've read the CAFE book and really enjoyed it. It explains how to implement the model in your room and, my favorite part, has sample lessons in the back for all the comprehension, accuracy, fluency, and vocabulary standards. I've ordered the new Daily 5 book and plan on reading that before school starts too. Their website also has TONS of videos and articles to support the model. 


So I learned a lot from the workshop and book; more than a typical professional development workshop. I felt a community between literacy teachers. I had a plan and was ready to implement, but I just can't share about this conference without sharing what I think made it stand out above every professional development workshop I've attended, and Lord knows I and every other teacher out there has attended hundreds if not thousands of professional development workshops. It all started in the first 10 minutes when the Sisters explained they weren't providing lunch because they do lunch. . . differently. I thought, "Weird, what could that possible mean?!" Well, about 30 minutes later we all found out. 

The sisters were talking about this great book, Dex: Heart of a Hero. It focuses on this little dog who wants to a superhero, but everyone tells him he can't because he's too small. Well, he buckles down and trains hard and then ends up becoming a famous and very helpful hero. The Sisters encouraged us to read it aloud to our students when talking about stamina. Just as I went to write down the title and author, they announced that everyone was getting a FREE copy of the book!! What?! My colleagues and I were so excited! They had volunteers pass out books to each of the probably 1000+ teachers in the room.

"How cool!" we all thought. Little did we know how cool it actually was. Over the next two days we got so much swag! Great books and tools that actually will help in the classroom. Many workshops give you a pen or, yes, ANOTHER tote bag, but this workshop gave us a ton of really useful things. We seriously felt like we were on the Oprah show by the end of it all. Look at all this stuff!


We got 4 really great books. We got chimes to use as a quiet signal, dry erase colored pencils (What?! I didn't even know they made those!) and a small white board, a timer, toys to help children focus and check for understanding, post-it notes, and tools to help kids track lines in their books. All this swag has got to be worth doing lunch on your own right?! They also gave use these really high-quality workbooks, notebooks, and STYLUS pens. Yep, that's right! Not just any ole' ink pen, but an ink pen that can also be used on tablets and phones. Super cool!


Long story short, (that was really long!), I really enjoyed the conference and walked away with useful things I am planning on implementing in my room this year. 

Of course, after the workshop I just HAD to start a project; making a cute CAFE board and Daily 5 signage. Here's a SNEAK PEEK! I'm hoping to get this project finished by next Friday

Wednesday, July 23, 2014

Digital Chevron Paper Pack FREEBIE


I've been working on my CAFE and Daily 5 stuff for my classroom. Here is a sneak peek! 

I'm really digging the Chevron pattern lately so I wanted to use Chevron Patters as part of my CAFE headers. I know you all love Chevron pattern too so here is a  Chevron Digital Paper Pack FREEBIE!! It has all the rainbow colors;red, yellow, orange, green, blue, and purple digital papers for personal or commercial use. Use them to liven up bulletin boards, worksheets, scrapbooks, blogs and more!

 Happy Day!

Jenn
Fun and Fabulous in First Grade

Tuesday, July 22, 2014

Tasty Tuesday: Easy, Delicious, Real Food Spaghetti Sauce

I love to teach. I love to kayak and hike, but I also LOVE cooking and eating yummy, REAL food. If you haven't checked out 100 Days of Real Food's blog yet, you just simply must. It started me on the path of enjoying cooking and homemade, REAL food. To honor this love in my life and because, heck, all people, even teachers, have got to eat right?! I am starting a weekly post called Tasty Tuesday!! I would have preferred something with the word yummy, but there are no days of the week that start with y, sigh. For my first Tasty Tuesday post, I simply must post about homemade spaghetti sauce because it was the first REAL thing I learned to make besides tacos and cereal :) I love homemade spaghetti. In my husband and my early years as 1 bedroom apartment inhabitors who lacked money, we ate spaghetti at least twice a week. The kind of spaghetti made with 99 cent pasta and jarred sauce. I grew tired of spaghetti because of these crummy meals and stopped eating spaghetti for a long time. One Sunday though I got a craving for spaghetti and wanted to make my own sauce. It could not have been easier, tasted better, or made my house smell better. It made spaghetti a much more sensory rich experience than a jarred sauce can ever provide and made me feel much healthier and connected to the Earth. Plus it is more cost efficient (you get loads more sauce for the same price as one jar). No high fructose corn syrup, no preservatives, no food coloring, just real, pure food. Now we only eat homemade sauce and it is one of my favorite indulgences that is quick, easy, inexpensive, and savory. Bonus: We used leftover sauce as dipping sauce for mozzarella sticks and it was delish!
 Ingredients (organic preferred but not required for all ingredients):
 * one 28 ounce can of diced tomatoes
 * one can of tomato sauce
 * one can of tomato paste
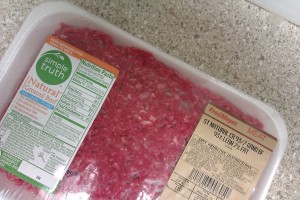
 * 1 pound of ground beef
 * one yellow onion
 * a handful of mushrooms
 * garlic
 * olive oil
 * salt
 * pepper
 * basil
 * oregano
 * sugar
 * oregano
 * thyme

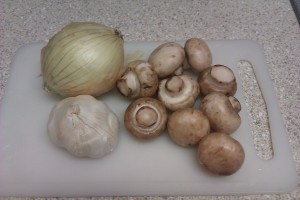
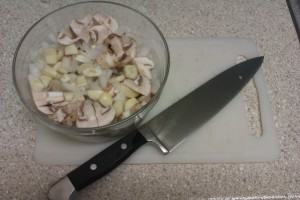
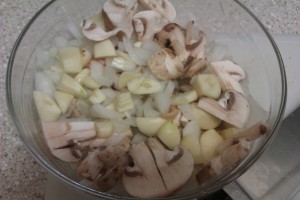
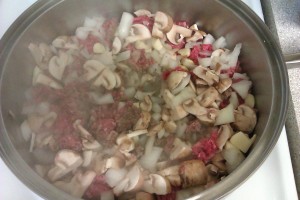
 Directions: 1) Chop onion, garlic, and mushrooms. I dice the garlic cloves in half and quarter the mushrooms. You could also add any other veggies you have on hand such as bell peppers, carrots, or squash.
Jenn Cell August 1st 2013 033
Jenn Cell August 1st 2013 034
Jenn Cell August 1st 2013 035
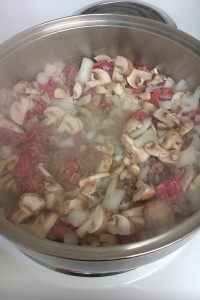
 2) Saute the mushrooms, onion, garlic, and ground beef in olive oil. It smells delicious! I don't add any seasoning at this point. Cook until the meat is still slightly pink (almost done) and the mushrooms and onions are tender but not overcooked.
Jenn Cell August 1st 2013 037
Jenn Cell August 1st 2013 038
Jenn Cell August 1st 2013 039

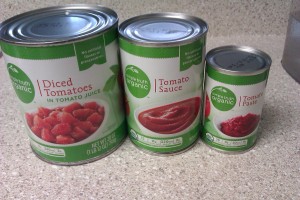
 3) Drain and put back in pan. Then add the tomato sauce, diced tomatoes, and tomato paste. I use this great brand, Simple Organic, that Fred Meyer has. The products always have comparable prices and are organic!
Jenn Cell August 1st 2013 042Jenn Cell August 1st 2013 043

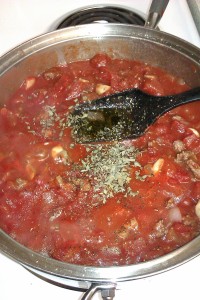
 4) Add seasoning. I didn't put exact measurements because I always eyeball and taste test spices and everyone's tastes are different. I would aim for 1/2 to 1 teaspoon each of salt, pepper, basil, oregano, and thyme. I also put in a pinch or two of sugar to cut down on the tomatoes acidity and then generously salt and pepper. If you are brand new to cooking, start with 1/2 teaspoon of everything and then taste test. Adjust accordingly to what your tongue tells you it likes :)
 5) Turn heat to low, cover with a lid, and simmer for an hour. Make sure the sauce is barely bubbling and doesn't get too hot. Check it once in a while and move the lid over a bit allowing steam to escape if the sauce gets too hot.
 6) Now you can serve with your favorite pasta, refrigerate, or freeze. Yum!

Happy Day!
Jenn

Sunday, July 20, 2014

Bee Themed Classroom plus Bee themed Nametag FREEBIE!!

 After finally getting my classroom somewhat organized Moving into a Messy, Chaotic Classroom, uggh!), I decided to take a break and make some fun but useful items for my classroom. Besides my Happy Birthday Bulletin Board, my most favorite thing so far is my Good BEEhavior Chart. What I love about this chart is that is allows students to easily self-monitor their behavior with a visual reminder. I also love the bright yellow color and the fun, whimsical theme of bees which I've incorporated into my classroom decoration theme (post about classroom decoration/organization to come in late August when I can get back into my classroom, yay!).
How it works:
1) The first week of school I will have each student make a clip with a pom-pom bee on the end. I call them over to my teacher table during free choice time.
2) All students start each day on Ready to Learn.
3) When they show good behavior, they get to move their clip up. It is critical that students do the majority of their clip moving. If the teacher is always doing it, the student will not make the connection between their behavior and the chart.
4) If they are not showing good behavior, they are asked to move their clip-down. Again, it is crucial that the students move their own clips.
5) Clips can be moved up and down all day in my classroom. This allows students the incentive to correct behavior if they know they can clip back up.
6) I have a system of rewards and consequences that go with each level. I have a detailed description of this system in my Good BEEhavior Classroom Management Pack 

In this pack is all the printables you'll need to implement this system as well behavior tracking sheet for student folders, rules posters, name-tags, writing paper, 3 different calendar cover-ups, and good behavior certificates! If you are using a bee theme in your classroom or are looking for an updated management tool, I think this will make a cute and useful addition!! 


As part of my excitement for this unit, I have uploaded my first FREEBIE! These adorable bee themed nametags for your student desks. Just click on the link below to download. Enjoy and Happy Day!